Getting Set Up:
When you subscribe to Career Central you will receive the programme with our standard format. This means that we have included lists of skills, personal qualities, career values, education and training providers etc for you. However it is important to note that you can edit these lists to personalise them for your students. You will also need to set up the subjects available to your students, how many they should select for each year level, and which subjects are compulsory if you would like to use the Subject Selection page.
We have created a tutorial for you called Customising Career Central click to see it.
Or follow the instructions below:
Use the "Careers Setup" tab on your dashboard.

It is important that you get the setup correct (as you would like it) before students begin entering data, as any changes you make after that might affect what they have already entered.
On the side bar on your home page choose “Careers Setup”
Under this tab you can set up and edit each page that students see, and you can also alter the order that the pages appear on the students’ screens.
If you have purchased the Bulls-Eye add-on your Careers Setup will look like this:
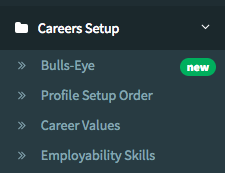
Click on Bulls-Eye and you will see the Bulls-Eye setup screen. For each year level you have the option to choose from 2 available quizzes. Add either one or both quizzes to the year levels you are targeting.
Future Pathways Assessment - designed for students from Y9 to Y13, this assessment looks at broad occupational interests, school subject strength and detailed job tasks to provide best fit results against 27 future pathways. University and non-university pathways are explored.
Vocational Pathways Assessment - designed for senior students who wish to explore pathways which do not require a university degree, this assessment looks at broad occupational interests and detailed job tasks to provide best fit results against 24 future pathways.
For senior students you could make both quizzes available and then students choose which one suits them. Simply drag the quiz you want from "available quizzes" to "Active Quizzes"

Profile Setup Order:
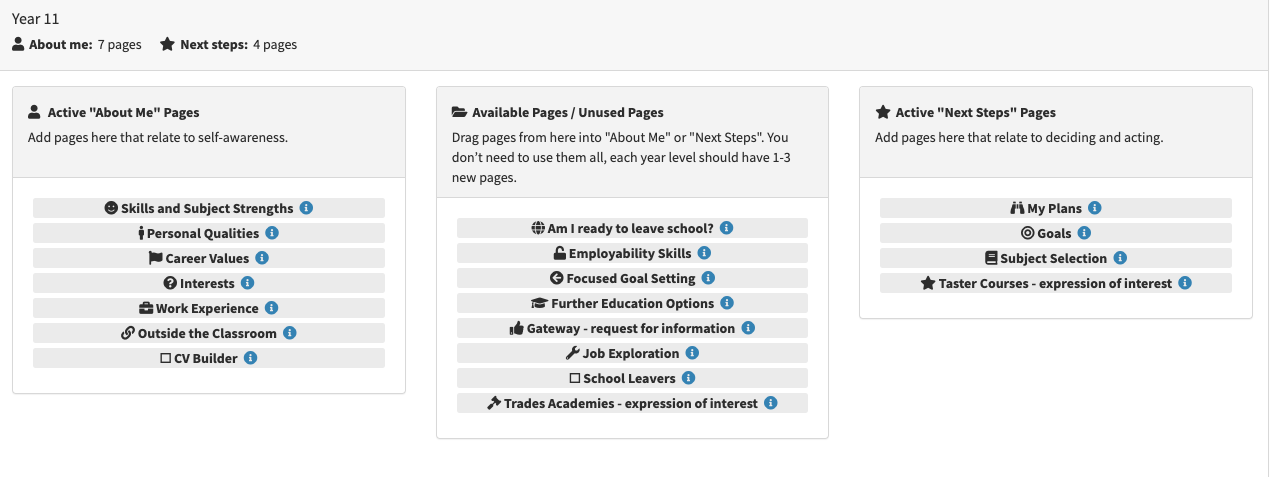
Here you will set up the pages you want each year level to see and the order in which you would like students to see the pages.
When you purchase Career Central a standard setup is already provided for you but you may wish to change it.
Under the “Profile Setup Order” you can change the order of pages that students see or you can hide the page from them. For example, since most year 10 students will be returning to school you may not want to show them the “My Plans” page. Similarly year 13 will not need to indicate subjects for the following year.
You may feel it is too early for juniors to see the “Further Education page”, or you might want to hide Gateway and Trades pages from them if they are not eligible to be involved in the programme.
NOTE: Just because pages are available you don't need to use them all! We recommend only asking students to complete pages when you are going to use the information. e.g. if your school doesn't really follow up with goal setting you may decide there is no point in using that page.
Each of the available pages gives you the option to add to the students "about me" tab or to their "next steps" tab. Simply drag the "Available Pages" to where you want them. Don't forget to save your changes.
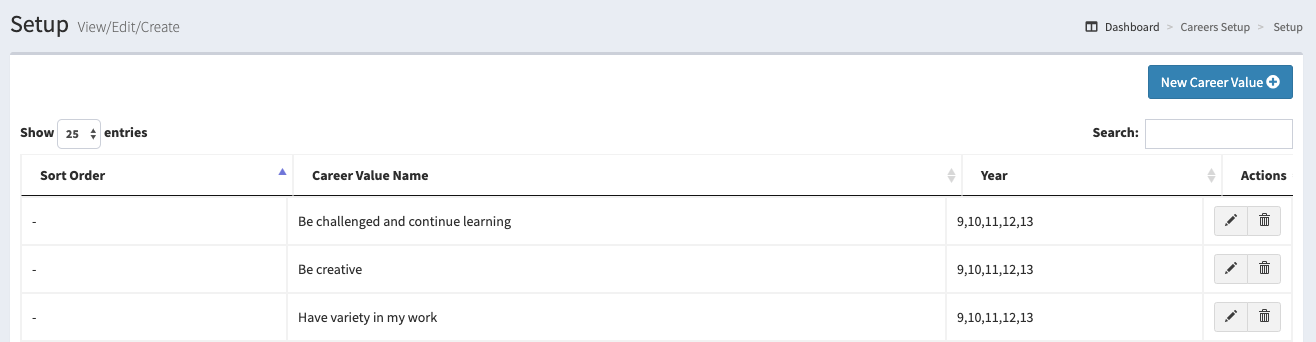
Careers Value page:
When you click on the Career Values page you will have the option to either add a new Career Value or to edit the existing ones. You can also choose the order that the values appear in and which values are appropriate for each year level.
The year level allows you to customise the page for different year levels, however, students will only see the page if you have made if visible to them (see profile setup order above)
Employability Skills
There is a page called "employability skills" which you can make available to students (usually just seniors) On the page students assess themselves from 'yet to develop' to 'very hight level' in 7 employability skills. You can edit the employability skills and also the description that students see.
Click on "employability skills"

When you click on 'edit' you will see the following screen:
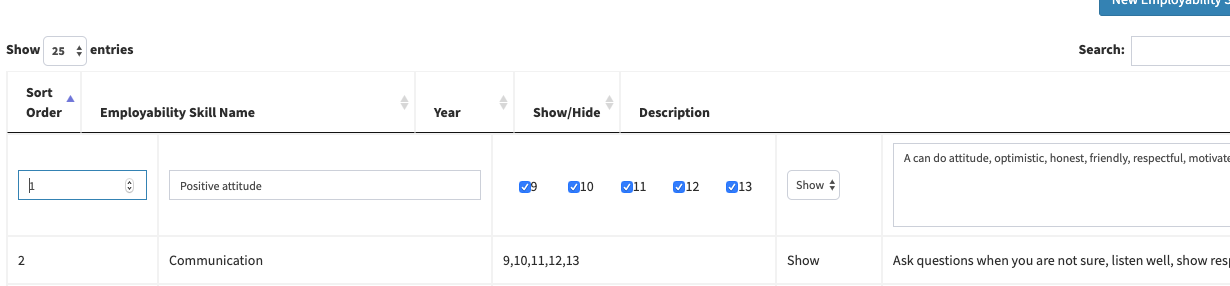
Ticking years 9 to 13 means the page will look the same for those year levels HOWEVER the page will only appear for the year levels you add it to under "profile setup order" see below.
You can change the skill description or add and remove skills if you want to.
Am I ready?
This page is suitable for seniors. It contains a list of things that students should do before they leave school (eg have a bank account, IRD number, CV etc...)
The page is divided into 2 parts. The first part is for all students asks "Do you have:" followed by a list of things for them to tick yes or no to. The second part is for students going on to further study and asks "Have you" this contains a another list of things they should have done (eg found accomodation, applied for student loan/allowance, RealMe ID etc...)
You can edit what appear on this page:
The year level allows you to change the page for different year levels but remember they will only see the page if you make it visible to them (you do this in the profile setup order)
Sort order refers to the order in which the questions appear.
If you click on "edit" you will see the screen below:
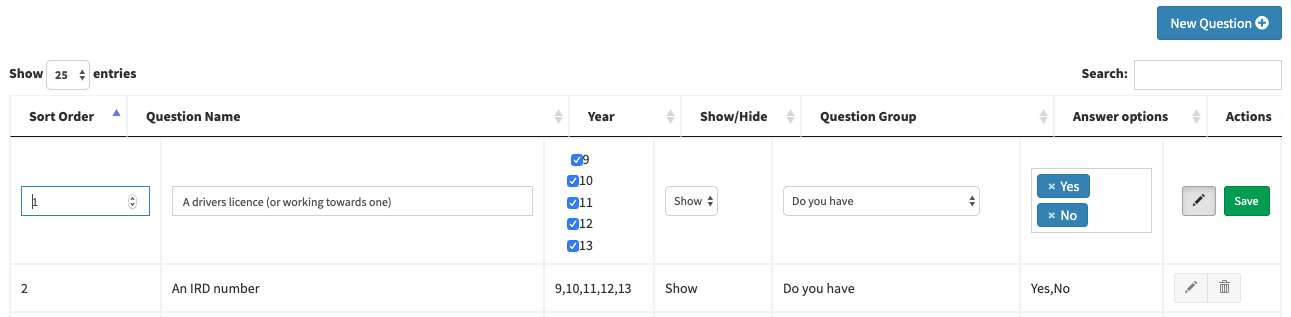
The "question group" refers to whether you want the question to appear in the first half where students are asked "Do you have" (this is things that all students should have) or the second half where they are asked "Have you" (this is for students going on to further study)
The question options at the bottom refer to adding more choice of answers. At the moment there is only a Yes/No
Focused goal setting (senior goals page)
There are 2 goal setting pages in Career Central, one is simply called "goals" and the other is "Focused goal setting" The simple goal setting page asks students to set 3 goals (one education, one careers and one other). The focused goal setting page is more often used for senior students. The students set one goal and then a series of questions appear eg "why is this goal important to you?" and "What barriers might you face?".
Some schools get students to set 3 goals first and then concentrate on one of their goals for the more focused page.

You can edit the questions that the students see. There are 5 standard question (above) which require students to really think about the goal, why it is important and how they will achieve it.
You can choose which year levels you would like to see each goals question, therefore allowing you to customise the programme and giving you the option to add further questions as the students mature. NOTE they will only see the focused goal setting page if you make it visible to them in the profile setup order.
If you want to add a new question, click the “New Question” button. Then a pop up window will open. It will have 4 sections: Select Years, Show/Hide, Sort Order and Question Name.
- First, select the years that you wish to see the new Goal Question.
- Then Decide whether you would want to show or hide the question in the Student side. Hide will hide the question from the students.
- Sort Order is the order that the Goal Questions are displayed in. Number 1 is the first question, number 7 is seventh in the list.
- Question Name is the name that you want to give the Goal Question
Once all details are filled in, ensure that you save changes.
To edit saved questions there is a button on the right that says "Edit Question"(for every question) that allows you to edit the saved goal question.
Handy Hint:
Beside save changes (in the question pop up) you also can delete the record if you no longer want to include this Question.
Skills and Subject Strengths page:
When you click on “Skills and Subject Strengths” you will find a list labelled “Subject” or “Other”
Students are required to select from a list of Academic Strengths that they think they have, and also from a list of more generic Skills. This part of the programme gets students thinking about what they are good at.
You can edit all of these to suit your students. You can make a Skill visible for a particular year level or for all students. This allows you to increase the level of sophistication in skills as students mature. If you want to add a new Skill or Academic Strength click on “New Entry”.

If you want to edit a skill click on 'Edit Skill'
Make sure you select either Subject or Other, and then type in the name of the Skill/Strength and save your changes. These will now appear in the students’ drop down lists.
Personal Qualities page:

As with other pages you are able to add new personal qualities or edit existing ones.
Interests / Student Questions page:
This page allows you the opportunity to find out about students’ interests. It also encourages students themselves to consider what it is they are really interested in and how that might apply to work.
You can also use this page to try and gauge how self-aware the students are with questions such as:
• What is your greatest strength and your greatest weakness?
• What do you see as the barriers to achieving your goals?
• Who influences your career decisions?
• Think about what you wanted to be when you were 10. If this has changed, why do you
think it has changed?
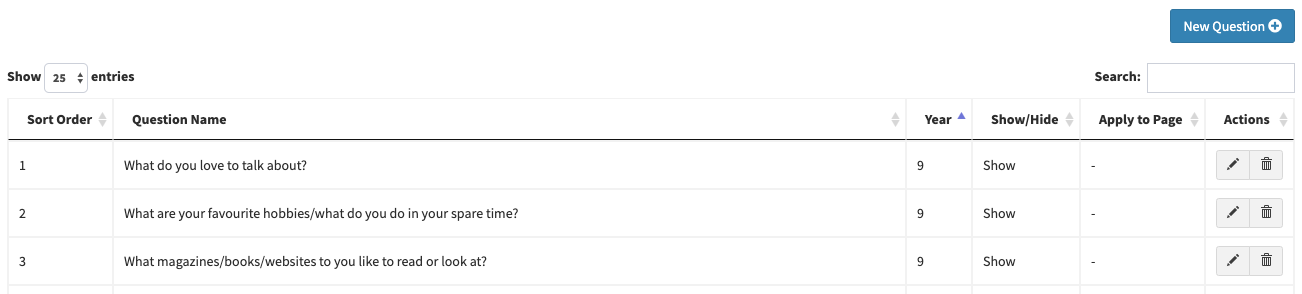
You can create as many questions as you wish for each year level. From the Student Questions
page click on “New Entry”. Then simply choose the year level(s), click on show or hide, then type in your question.
NOTE: It is best not to have too many questions, we recommend between 3 and 5 or 6 max.
The sort order controls the order of the question on the student side. For example, entering 1 will make it appear before a question with a sort order of 2.
At the beginning of each new school year you have the option to change the questions that students see, however it is not advisable to change them during the year once students have started responding to them.
Intentions for next year / My Plans page:

This page allows you to set up options for students to choose in order to indicate their intentions. Since most year 9 and 10 students will be returning to school we usually only show this page to senior students. (remember the profile setup order allows you to choose which pages each year level sees)
On this page you can edit the wording of each option (e.g. change the name of the school) or you can click on “New Entry” to create new options for students to choose from. For example, “I would like to leave school as soon as I can”.
On the staff side you can then see a table of all the students plans. Under Lists click on "my plans" and you will see who has picked each option.
Subject Setup Page:
This page is where students will indicate to you the subjects they are considering taking the following year. This allows you to give the students feedback on whether or not you think the subjects are a good match for the occupations they are interested in, before they make their final selections.
On this page, please enter all the subjects that are available for the specified year level – i.e. if there is a year 10 subject called English, create it, and enter 10 for the year. You can also enter a subject export code e.g. ‘10ENG’, which is the code that appears on KAMAR for the subject – and is what is is exported from KAMAR if you use the data for another programme.
If a subject is compulsory, you can select this as well. Compulsory subjects will automatically appear when a student comes to make their choices.

A couple of really important notes: Once Students have begun selecting subjects, don’t rename the subjects in this screen, or change the subject’s export codes.
Only enter in the ‘Custom Code’ if you are setting up complex subjects (eg students must select one Science from a range of options but no more than two). This option will appear before the rest of the subjects are shown to students.
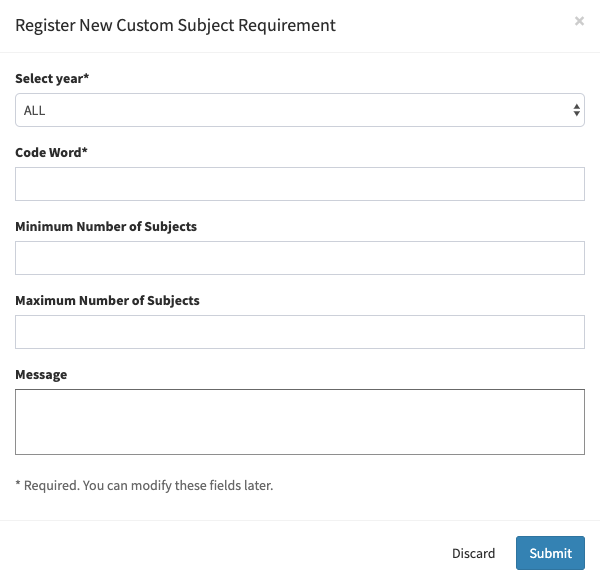
To set up Custom Subjects, scroll to the bottom of the page. There you will see a heading "custom subject requirements" and click on "new requirement".
Write in a code word eg Y11SCIENCE15 (year 11 science set up in 2015)
Select the year level
Select the minimum number of subjects the student must choose as well as the maximum number.
Write a short message for students to see.
Once the custom subject requirements are set you need to add the custom code to your subject page. Make sure it is exactly the same code that you set as the code word.

You can set up more than one custom code. Eg in some schools students need to choose a subject from each faculty. Or choose 2 Arts, 2 Technology and 1 language subject.
Note: You will be adding the subjects available at each year level, but when students see the options on their page they will see the year above the one they are currently in (so a year 10 student will see the options you add for year 11).
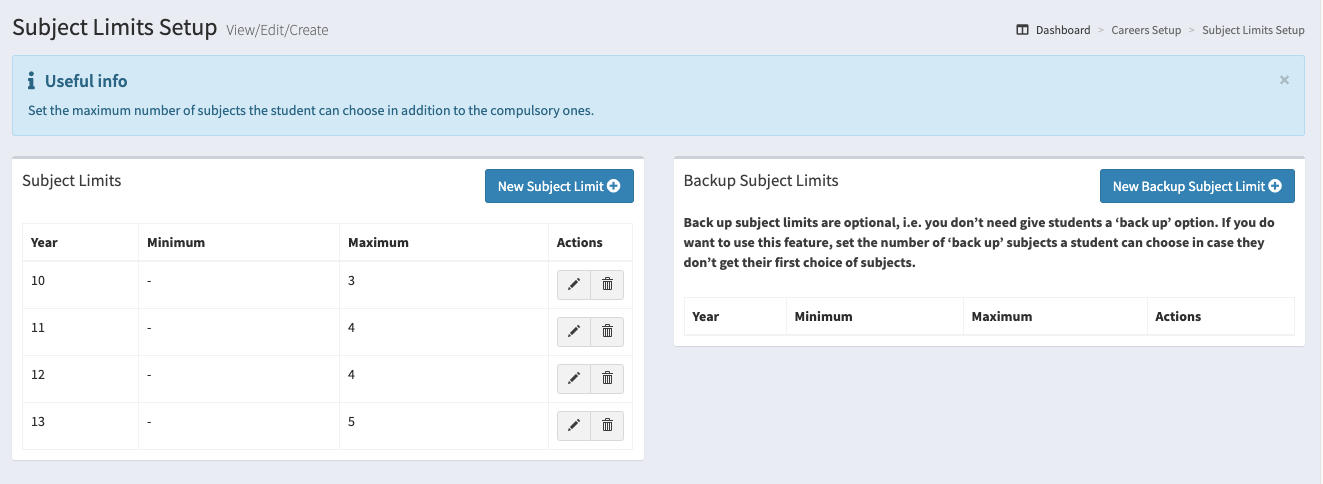
Subject Limits Page :
On this page you can set the maximum number of subjects a student will be able to select. The number you choose will not include the compulsory subjects. For example if a year 10 student has five compulsory subjects and is allowed to choose three options you should set the subject limit at three subjects.
The wording on the page will use this number to indicate to students how many they should select and the options will disappear once they have chosen the appropriate number.
Resources page:
The resources page allows you to change both the order and the colour of the pages which students see when they click on their "Resources" tab. Simply drag them up and down to change the order and click on the colour wheel to change the colour.
If you want to add new pages to the resources area do this in Page Setup below.
Page Setup :
This tab allows you to edit the icon or wording on each of the student’s pages and decide if you want this information visible on the parent portal.
Click on edit to change the wording e.g.

This is also where you can create new pages. For example, a new request page or a new resource page.
Click on New Page, fill in the page’s title, the page contents (the wording you would like to appear on the page) and select the module name. If you are creating a request page (Gateway, Trades and Taster courses already have request for more information pages) then choose Request page (custom) in the module type.
If you want to create a new Resource page (students see these under their resources tab) fill in what you would like on the page, including any links, and choose Resource page for the module type.
Any new pages need to be in one of our templates (this is the module name). For this reason it is best to only create new resource or request pages.Don’t forget to save them.
Student Mobiles:
In this section you can manually add a student’s cell phone number manually. You can do this if they are having trouble with their phone of if they have input the wrong number too many times.
Staff
(the staff section is actually below career setup but we have included setup instructions here as well)
In the staff section you can see the access type of each staff member.
TEG = General teacher/group teacher – has access to students in their group/tutor class and can add interview notes. The TEG code should come through from kamar automatically if the teacher has a "group" class (sometime called form/whanau etc..)
CSA = Careers advisor – full access to see all students and edit.
TEA = Teachers with full access (e.g. Deans, senior management). Can see all students and write interview notes but not edit the programme.
MM = Only has access to Media Manager (e.g. for a librarian).
DIS = Disabled account.
TRT = This is for Trades Academies so ignore if you are a secondary school
Staff will access Career Central using either Kamar login details, Google or Microsoft logins.
If you click on “Edit User” you can choose to show the staff member on the message page (so students can message them), or the Interview page. It is advised that you only add careers or guidance staff to these sections.
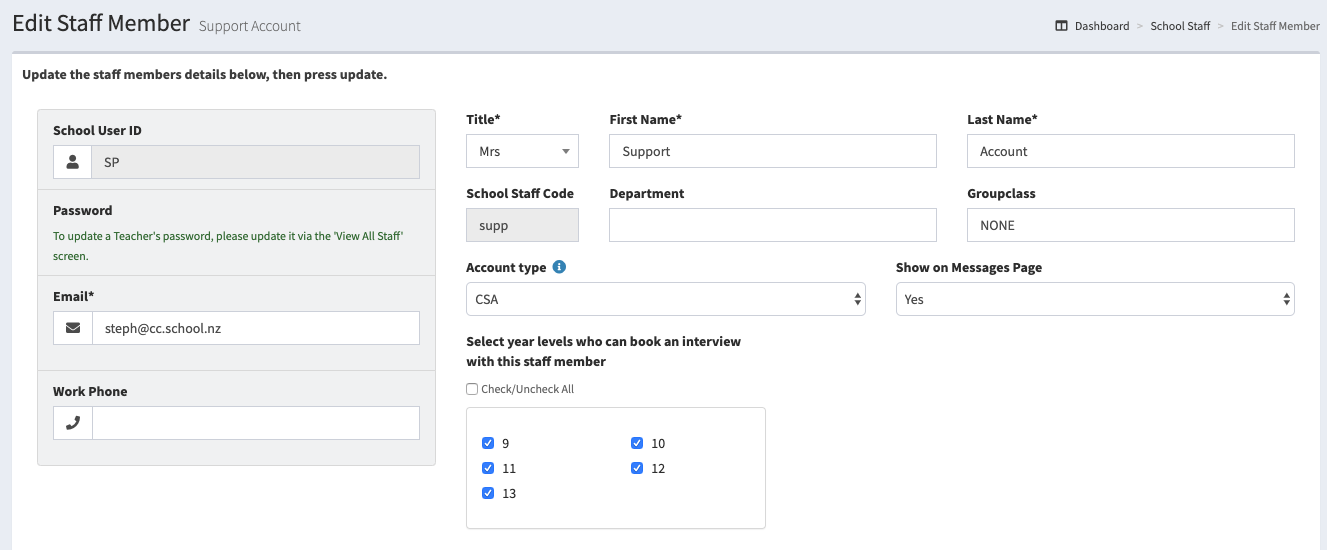
On this page you can also decide which staff members are visible in the students Mailbox and Interviews tab. This means students can message or request interview with them. You can also make some staff visible to just some year levels eg deans.